3D Printing is good at a lot of things, but sometimes you want to print something and the print just keeps failing! One super common issue is warping of a bottom surface during a print. When you print a large flat area attached to the bed, often times the part will not come out of the full print with a flat bottom. Usually some part of the print will peel up from the build plate, no matter if it is heated, or even if you have a really nice build surface.
There are a few ways to mitigate the warpage caused when printing large flat surfaces, but first let's look at the warping itself. Thermoplastics, the group of materials used for filament 3d printing, expand when they are heated and they contract when they are cooled. The printer baseplate is usually made of a material that expands and contracts much less than the plastic used for printing. This results in lower layers contracting as they cool, and therefore lifting off of the print surface to get to a state of lower stress.

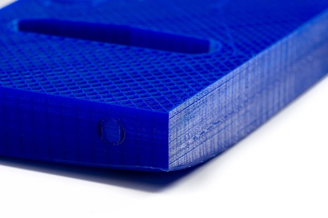
An example of 3D print warping. Photo from All3DP.
Some of the most common ways to fix this are attempts to force the bottom surface to stick to the print bed, whether it is with glue, hair spray, a heated bed, or other brute force methods. There is another very effective method that results in nice prints as long as the bottom flat surface doesn’t need to be fully flat.
One very simple thing to do to the bottom of a surface is to pattern it such that there is regular contact area between the part and the bed, without having such a large flat surface that there will be a lot of stress buildup within the part.

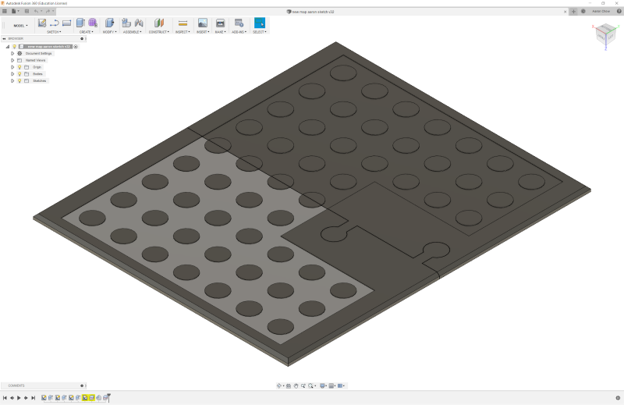
An example of using pattern creation to decrease print warping. Screenshot by Aaron Chow.
The lighter grey area is inset 0.2mm into the part. The face on display is the face to be printed directly on the build plate of the printer. A 0.2mm offset was chosen because it is the thickness of one layer, so only the first layer of the printed part is affected. The second layer will bridge between the features found on the first layer. The border remains such that the bridging of the second layer will hopefully happen flawlessly. The circles for adhesion must be large enough to stick to the bed, but not large enough that it will have stress in itself and pop off. I used 15mm circles here on this panel. Gaps between the circles must be small enough such that the printer will be able to bridge them without failing, and repeatedly create a flat layer on top of the base. I used 10mm spacing between the circles on this part. You can also see the pattern is not continued where the parts interlock, to ensure the interlock is not compromised.
Pattern creation on the reverse surface of the part allows for repeatable creation of large flat surfaces without warping or loss of dimensional accuracy.