Guest post by Brooke Adams, Conservation Technician, Dept. of Preservation & Conservation, University of Michigan Library
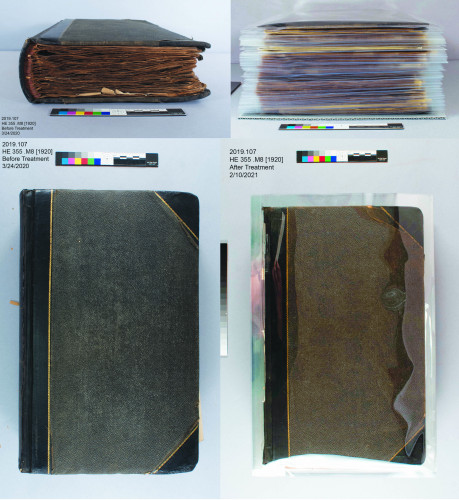
Photograph shows, from left to right clockwise, side view of scrapbook before treatment, side view of scrapbook after treatment, front cover of scrapbook in protective sleeve after treatment, front cover of scrapbook before treatment.
Towards the end of summer 2020 the Conservation Lab began a slow return to on-site work. It was during this time that I, as one of the conservation technicians, began mending and rehousing the International Good Roads Tour Scrapbook. The scrapbook was compiled by William Sydnor Gilbreath Sr., a businessman and strong supporter of the Good Roads Movement (GRM). The scrapbook was created during Gilbreath’s participation in the 1920 International Good Roads Tour through Michigan and southeastern Ontario. The tour was a promotional event for the GRM, which advocated for government spending and legislature to improve rural roads – an incredible advancement over the inconsistent, district-by-district construction programs that generally existed in the United States before this time.
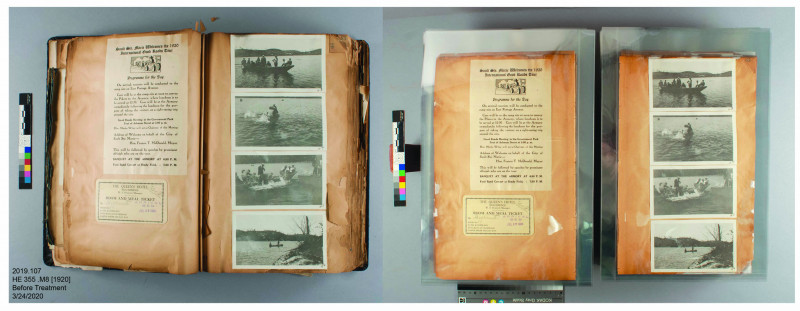
Photograph shows two pages near the front of the textblock before treatment (left) and after treatment (right). There are several examples of wear and damage seen in the left photograph: a broken section of brittle paper near the fore-edge on the right-hand page, discoloration of the paper and surface dirt around the edges of the pages, a dog-eared corner, and loose paper fragments in the gutter of the book.
The scrapbook is part of the Special Collections Research Center’s (SCRC) Transportation History Collection. As with any object from the SCRC, the first step in my conservation treatment is to complete a condition report and form a treatment proposal. The condition report involves documenting the specifications of a book – the size of the object, the materials from which it was made, and how the book was constructed. I also document the condition the object is in and where certain aspects of degradation can be found. When I began to analyze the scrapbook it felt slightly overwhelming. When closed the book was 15” long, 9.5” wide, and 3.5” thick. There were over 230 brittle, crumbling pages, with stiff photographs adhered to the compromised paper, fragile newspaper clippings, and a tattered, folded map tucked into the back cover. The book was a fascinating compilation of Americana, but it was impossible for anyone to access the information without causing further damage.
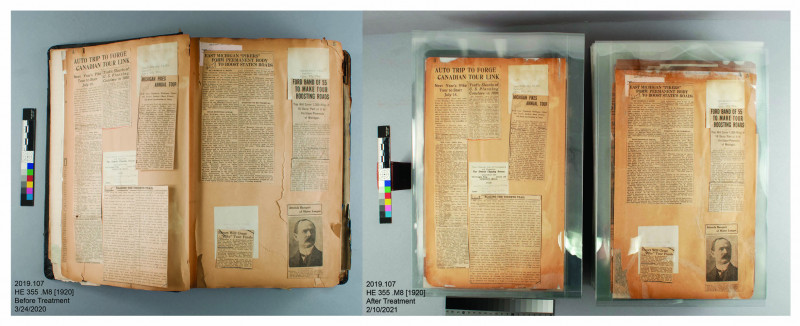
Photograph shows a before (left) and after (right) example of tear repair. Tears and voids were mended using Japanese paper coated in wheat starch paste.
When creating the treatment proposal for this book, our head of conservation, Marieka Kaye, and I had to consider how it would be used – would it be scanned and digitized at some point in the future? Would it be used by students or researchers, or displayed by professors? We ultimately decided that the safest option was to take apart the binding. I’d then weld two pieces of polyester film together along the spine and bottom edges and place each page within its own polyester film sleeve. Once the pages were encapsulated, the sleeves would be placed in a custom-ordered box, and head back to the Hatcher Graduate Library, ready for use within the SCRC reading room.
Some of my favorite conservation treatments start with taking apart the binding of a book. It’s fun to see how a book was put together, and in the case of this scrapbook, it felt great to remove the delicate pages from a structure that caused damage with every turn. Once the pages were removed, they needed to be surface cleaned. Decades of surface dirt had settled along the outer edges of the textblock, coating the paper in a fine layer of black grime that was very satisfying to remove with the use of a soft bristled brush and a smoke and soot eraser.
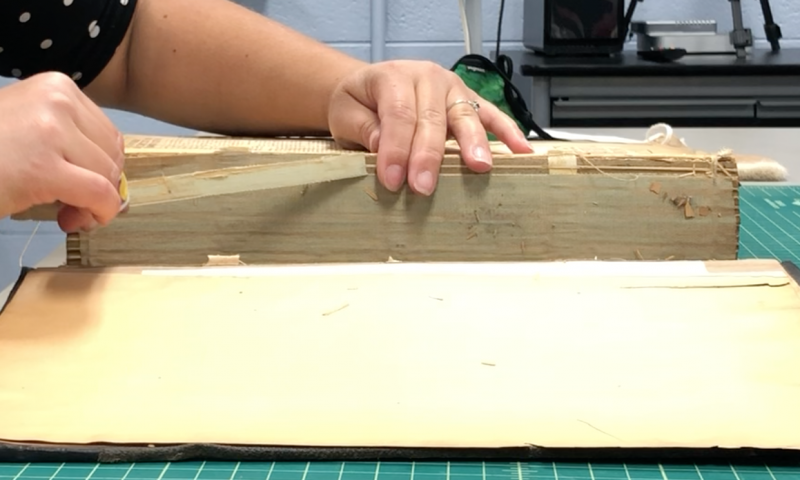
Photograph shows the early stages of disbinding the scrapbook. The spine liner was brittle and easily pulled away from the textblock.
After surface cleaning the textblock, I looked for pages with attached newspaper clippings. Most of the newspaper clippings within the scrapbook had been folded to accommodate long pieces of text. Newsprint is typically printed on a thin, inexpensive paper made from wood pulp. The acidic quality of the wood pulp causes the paper to discolor and turn brittle as it ages. The newspaper clippings were very fragile along their folds. I used a small amount of moisture to relax the folds so they could be flattened without splitting, and then I reinforced the creased areas by applying a thin Japanese paper called Tengucho to the page using wheat starch paste. Tengucho was the main mending paper I used for both the newspaper clippings and the pages that made up the textblock. The Tengucho is thin enough to see through, allowing me to mend areas that had text or other forms of media. In addition to its thinness, Tengucho was also strong enough to mend vulnerable areas without overpowering the integrity of the weak, acidic paper to which it was adhered. Mending brittle paper can be very tricky, but since the scrapbook pages were ultimately being housed within polyester film sleeves, I knew the very thin mending paper I chose was suitable.
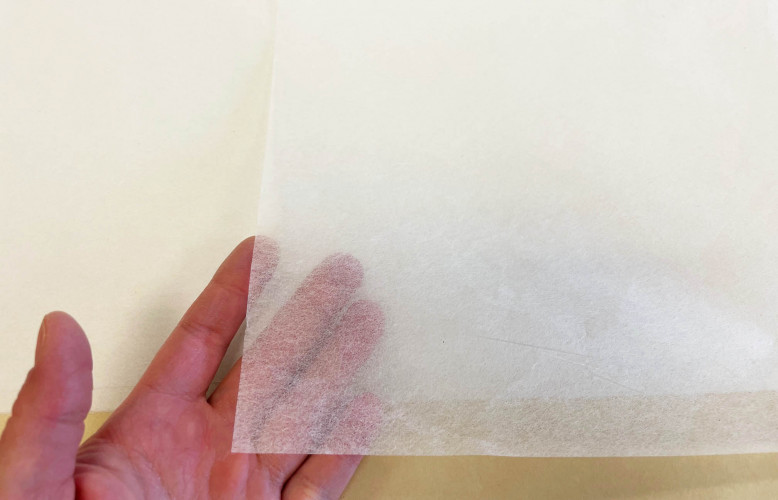
Photograph demonstrates the thin, transparent property of Tengucho paper.
After the paper mends were completed throughout the textblock and the delicate pages were safe within their polyester film sleeves, I began the final step of treatment – the large, folded map of Lake Heron that had been placed between the last page of the textblock and the back cover. I observed that the map was originally glued to the back cover because of the matching adhesive stains on both objects.
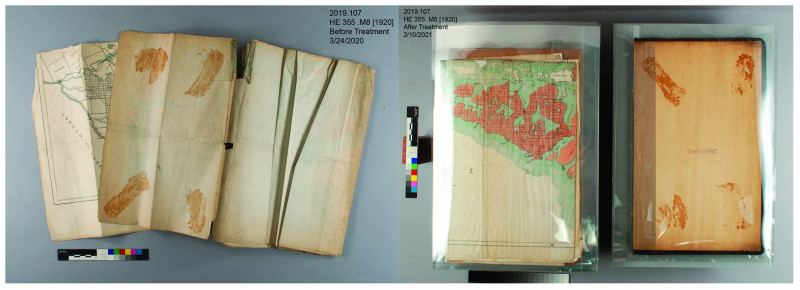
Photographs show before (left) and after (right) treatment. The matching adhesive stains can be seen on the back of the map and the back cover of the scrapbook. The “after treatment” photo shows the final step of treatment, which involves placing each page into a Mylar “L” sleeve, protecting the object while keeping it accessible.
The map was folded so it could fit within the dimensions of the book, creating many vulnerable creases prone to tearing. When I unfolded the map, I found that it was split into two pieces. I brought the map to our conservator, Amy Crist, and she tested a few colored areas to see if the inks used on the map could withstand a water bath. Some of the colors lifted from the map when tested, meaning the ink was water-soluble and a bath wouldn’t be an appropriate cleaning method. A water bath would have had several benefits for the map, such as removing acidic elements within the paper, lessening the adhesive residue on the map, and strengthening the map’s ability to be folded; however, I had other methods available to improve the object’s integrity. I started with surface cleaning the map, carefully using a smoke and soot eraser to remove surface dirt. I then set up a humidification chamber so the paper could be flattened and later mended. I filled a plastic tray with enough water to cover the bottom, placed a slotted plastic rack on the bottom of the tray, and then set the map on top of the rack. A large rectangle of Plexiglass was used to cover the humidification chamber and the map was left to slowly relax and humidify for a few hours.
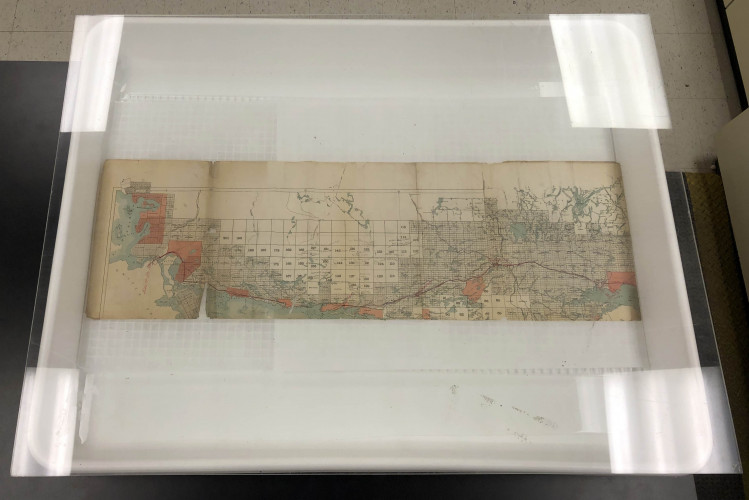
Photograph shows the humidification chamber used to relax and flatten the map. The map was split in half along the centerfold prior to conservation treatment. This made humidifying the map relatively easy because it could be done in small sections.
Once the humidification process was complete, I removed the map and flattened it out on a table, placed it between two thick pieces of blotter and put the whole stack under weight for the rest of the workday to dry. The following day I removed the map from its stack of blotter and began mending tears and filling areas that were missing paper. I used two different weights of Japanese paper to do these mends, depending on where the mend was being placed. The fold creases were reinforced with thin Japanese paper and wheat starch paste. Once the map was back in one piece and the tears were repaired, I folded it along the original fold lines and placed it within a polyester film sleeve.
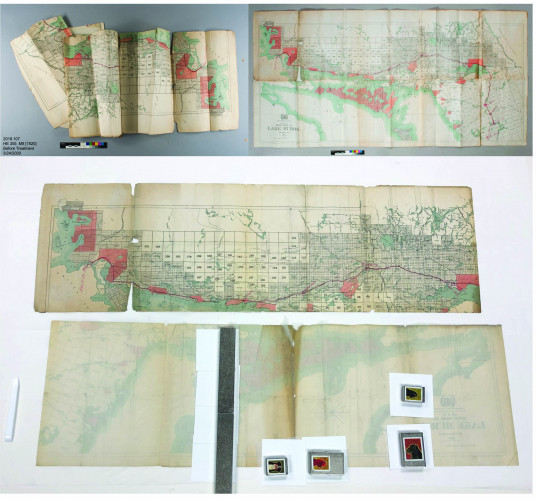
Photographs from left, right, and center: The map before treatment, after treatment, and during treatment. Dried paper mends before they’ve been trimmed can be seen in the “during” photograph. Damp paper mends are being dried under small metal weights. Square pieces of blotter and a spun polyester fabric called Hollytex were placed between the mend and the metal weight to aid in drying.
The last aspect of a conservation treatment involves taking after-treatment photographs and recording what treatment decisions were in fact used to stabilize the object. The treatment of the International Good Roads Tour Scrapbook was a huge project for me, taking 6-months and 140 working hours to complete. Each page within the book was a stand-alone treatment. I am hopeful that the time, labor, and materials that went into this book will keep it stable and available for patrons of the library to use for decades to come. I learned a lot during this treatment and I am grateful for the opportunity to work on this piece of American history.
- Brooke Adams